Pages

Sunday 11 December 2011

More Preparatory Work...

Another Background Visualisation

For my production bible, I decided to draw another background visualisation such as the one in a previous post showing Mollie in a classroom. In this one, I would purely focus on the background and instead of drawing everything in Photoshop, I would draw it in pencil first and then apply colour in Photoshop after scanning.

I set about drawing the background. I decided to work on watercolour paper as a precaution if I wasn't able to achieve the desired effect using Photoshop.

I scanned the piece in and made sure the image was lighter by adjusting the "Levels" control on Photoshop. Unfortunately, the left-hand side of the illustration did not scan well, and left a shadow impression. I tried to fix it using the clone brush tool as well as the eraser, though it did not help greatly. I know that for my final backgrounds I will have to adopt a better way of scanning, or to use a larger university scanner to make sure the image comes out at a higher quality.


However, I pursued with the test, and spent about 30 minutes colouring the frame in shades of purple. It did not quite achieve the level of "shadowing" I was hoping, (for this scene in the film will be mostly in shadow with only the light from the door on the floor really prevalent in the shot) but for now, I liked the dry brush setting and the impression of shadows particularly on the bags. I much prefer the pencil quality to that of the entirely Photoshopped visualisation shown in previous posts.


I will therefore be using this method to create all my backgrounds for my final film.


Extra Characters

My film requires a number of background characters, being set in a primary school. Classmates will be shown in the background in a few of the first scenes to show Mollie's isolation. The idea to draw the characters as my own friends came to me a few weeks ago, as posted before. So here are a few more pictures of more background characters who are influenced off more friends in real life!


 (The last one is me!)


As well as this, I quickly designed some ideas for the teacher and final child designs for the girl with the skipping rope who makes friends with Mollie, as well as the small girl who is seen in the end scene, alone and upset. For the latter, I will be going with the top right design, as the small bunches give her a younger and more innocent look which I hope will let the audience empathise with her.


Final Designs

Here are the final designs for Mollie and Babbit.

...and some quick new drawings of Babbit's new style...(mainly to get used to drawing his limbs in a simpler style):


...and some new sketches of Mollie too...


Birds Eye View of Mollie's Classroom

 I thought it was necessary to draw Mollie's classroom in this view to make sure staging for some scenes set in and outside of the classroom are accurate and won't suffer any continuity errors.


---jkl

Second Animatic w/ Feedback - and Third Animatic!

The Second Animatic
After Matthew's feedback on my first animatic, I went back and changed a lot of my story to try and fit in the relationship build-up of Mollie and Babbit, which Matthew had said, "was not present" in the film. I understood completely where he was coming from, as in this first animatic, the amount of screen time with Mollie and Babbit together is very small, which, for a film about a friendship, seemed a massive flaw.

Babbit - Second Animatic [Rough] Vimeo Link

So I decided to change certain aspects. To begin with, I cut out the first shot of Mollie and Babbit together, as Matthew said he liked the meeting scene with Mollie and Babbit in the coatroom, and thought that would work well as the first introduction to Babbit for the audience as well. So I began instead with the shots of Mollie looking sad and isolated in school amongst her classmates.
 The biggest change I made, however, was to have another character who appeared in the first animatic, have a bigger part. The little girl with the skipping rope who wants to play with Mollie in the first animatic is seen earlier on in this second animatic when Mollie is playing with Babbit.
 The reason behind having the girl introduced earlier is to show the audience that when Mollie is seen wanting to go play with someone else who is not Babbit, then Babbit grows smaller. It happens earlier, just before we are introduced to the girl too, when Mollie and Babbit are in a scene in the playground. Mollie is drawing on the ground (with chalk) with Babbit - and the other children are doing the same but across the playground from where they are. When Mollie looks up and sees the other children, we see her looking like she wants to go and play with them. With a few angle changes, we then see Babbit suddenly a bit smaller, as Babbit is beginning to realise that Mollie is starting to grow up and become more independent and doesn't need him. Babbit growing smaller every time when Mollie is seen wanting to grow up was an idea that Matthew really wanted to see in my film, and this was how I went about producing that.

 After the first "encounter" with the girl, it is more obvious that Babbit is smaller, and this is when the teacher comes in and takes Babbit away, as this was a scene I wanted to keep in. Thereafter, the film is pretty similar to the first, with a few extra scenes adjusted; i.e.: the time lapse scene in the middle, and the ending in a silhouette form.

Here are some rough thumbnails I worked on whilst developing these new scenarios. 


Feedback from James
 James did not like the second animatic as he felt that I had now made the film "too literal" in the sense that everything was explained too much and there was nothing left for the audience to uncover for themselves. He said that it lacked the subtlety of the first animatic, and that it would be best to go back and refine the first again, with a few ideas from this animatic, but mainly to keep the subtleties and explain the friendship between Mollie and Babbit in a few still illustration scenes with hardly any movement, instead of these drawn out and literal scenes shown in this second animatic.

I totally understood James' comments, as I didn't have a 'gut feeling' about this animatic, even as I was making it. I made it, trying to live up to Matthew's feedback, but obviously, I didn't want to completely lose the subtleties of the first, though unfortunately, I had. James' critique helped me re-look at my first animatic and spot points that could be improved on and altered. This critique session helped me really envision my film much more clearly, and I believe the changes I made to the animatic in the third version are definitely better executed and still retain the friendship of the characters and the heart of the story.


The Third Animatic
  So the main problem Matthew had to start with was the lack of screen time of Mollie and Babbit together. In the discussion with James, we both came up with the idea that the relationship moments with Babbit could appear between the first shots of Mollie on her own in the classroom. I would show Mollie alone at a table, sad and upset, and then the next shot, Mollie could be sat in the library cuddled up to Babbit reading a book. And as I had three scenarios of Mollie alone, I could easily intersperse three more scenarios of Mollie and Babbit together to show their relationship clearly in a montage.
  So I quickly went back with this feedback and drew up some new frames to put into the first animatic again. Thankfully, this did not take too long.
 I also chose a different piece of music to the one I used in the second version. The new animatic did not fit well with this previous piece, so I went back to a piece I had chosen a few weeks back which I had noted down as a possibility. Erik Satie's "Gymnopedie #1". I love the first phrase of the piece, the simple repeating chords really worked well with the first scenes, and thankfully, pretty much the entire piece of music fitted well, with some minor alterations at the end. I love how soft and emotional the track is, and I feel that it really helps the audience watching connect more with Mollie as a character to empathise with. I will be showing this piece to my composer to discuss ideas inspired by this music choice.

Here are some pages of drawings, thumbnails for shot development and new final shots for the third animatic:


Third Storyboard
Here is the storyboard for the third animatic:


I definitely feel this animatic has more weight and works better story-wise than the first and second. I will be showing this to my peer group on the 12th December after the Hand-In and hope to get some feedback on it. After this feedback, my next task will be to re-draw the entire animatic, adding more effects (with the aid of After Effects) to make a clearer and more detailed FINAL animatic for the second part of our Hand-In on the 16th January.

Here is the third animatic that I will be submitting as my final Rough animatic for my Hand-In deadline on 12th December:

Babbit - Third Animatic [Rough] Vimeo Link


Next Post: More Pre-Production Work.


---jkl

Monday 5 December 2011

Another Colour Scene Test - Production Schedule

Colour Scene Test


After the feedback discussed in the previous post, I decided I would simplify the colour scheme for the entire film. In the time we have, it just won't be achievable to fully colour all the backgrounds and character fully. I much prefer simple colour washes anyway, so shown above is another visualisation for a final shot for the film. I very much prefer this version to the coloured one (shown below). It has a more graphic impact, and gives the piece a nostalgic and child-like illustrative quality which I wanted to show.


The multiple-coloured version in comparison, I think, kills the detail and seems disjointed with the pastel colours for the background and the bold colours for the uniforms. I did like the blending to white effect present on the left-hand side of the image to give the impression of light. I used this in the purple version.
The purple version also took a lot less time to colour. Obviously, it is still a rough visualisation, and more time will be spent on the final image. I will continue to test different brushes, drawing methods and textures that can be used until I am satisfied with the result. Overall, the purple version looks better and is less time-consuming. I will show this to my tutors later this week to discuss it further. 

Second Animatic

This week I have also produced my second official animatic. After some feedback with Matthew, I re-storyboarded the film to include more scenes with Mollie and Babbit together to show their friendship more clearly. 

Again, with this storyboard, the drawings were roughly done, so the quality of some of the images in the animatic are very bad. As this deadline required a rough animatic with sound, I decided to keep it very rough for now, and will clean it up considerably for the detailed animatic deadline in January.


I used a piece of music by Liszt. "Consolations, S 172 - Lento Placido". The track fitted the mood of my film relatively well. It is a tad "grand" for the final film, but for the animatic it works, with some emotional beats fitting well. I cut the last section of the song using Premiere Pro very roughly so the ending of the song ended with the animatic too. The animatic is pretty much 3 minutes long exactly, so full animation is about 2 minutes, 50 seconds. There still may be some pacing issues, as Matthew told me to cut some scenes down as they were too long. I tried to do this, but I will show this to him and other tutors this week to see what they think.

Feedback on the second animatic from James:
I showed the new animatic to James earlier today, and unfortunately he found the new animatic way too literal. In the previous animatic, the moments between Mollie and Babbit and Mollie feeling shy and anxious were way more subtle than the new version. I wanted to take on Matthew's points, but I can absolutely see where I went wrong. I think I was panicing about the relationship with Mollie and Babbit coming across well, instead of trying to think of clever shots. I had changed a great deal, bringing the 'other classmate' into the story more, and making the story more literal. James reminded me that in film, things don't have to be completely literal, and that there could be much more subtle shots that indicate Mollie and Babbit's relationship that could speak a great deal more than literally explaining everything in unnecessary scenes. 
So unfortunately, I will have to abandon a lot of the newer elements I included in the new animatic and go back to the first version to refine and make clearer. It was unfortunate, especially as I spent a long time on Premier Pro to help the animatic flow clearly, but overall, I want my story to be subtle and sweet. I lost sight doing the new animatic, as I overlooked lots of moments in an attempt to keep to the points Matthew gave me. I perhaps went a little too far in the wrong direction! I will now refine the first animatic, with some parts of the second(!) to make sure I have a clear idea ready for the Christmas holidays.

Production Schedule

I also produced a Gantt Chart to pre-visualise the time I have in production for the film.


The red squares represent the week of final deadline. I included my dissertation in the 'Task' column too, as this is something I definitely need to schedule in too!! 

The final deadline for the film hand-in is the 14TH MAY. 
I have made sure that compositing and editing of my film will happen at the same time as my animation. I could set a weekly task to scan and put together my work from the week and put it into my animatic for timing/layout and composition checks. By doing this straight away, it will ensure I won't have anything outsandingly wrong or difficult to fix at a later stage in production.

Overall I want to be spending the most time focusing on the quality of my animation. I have highlighted the time to finish animating around the last week of April. This would give me enough time to then finish colouring and compositing everything together. This is my aim, though it is likely to change as and when I start!

Planning for Production

I will hopefully ask some second and first year animators to help me with the colouring of some of the frames too. As the colour scheme will now be very simplified, it will hopefully mean the colouring process won't take as long. I will test some more colour ideas and possibly time it and then try to calculate more accurately how long colouring will take. From last year, when I worked on Eva Wagner's film, I was able to see her own production schedule for her fully hand-drawn animated film, "Sun and Moon". I noted how efficient she was in organising her time, with daily aims in number of frames. She had started animating before most of the class, and everyone remarked on her dedication. From seeing her working method work so well, I will be aiming to do the same. I will stick to the schedule as tightly as possible. I want to be proud of my final film, and above all, I want it to be finished. Strict dedication to the schedule is the only way to fully realise this!!

I will produce another schedule that fully realises everyday goals. Eva worked every day for several months producing 60 frames a day. I will work out the 'math!' and post this as soon as possible, though it will most likely be similar, if not exactly the same to Eva's! 

All pre-production work is due in on Monday 12th December, so exactly a week! I'm positive I'll be able to hand this all in in time. It'll be great to "finish" the pre-production and move on to the actual production stage. I will be updating at least one or two more posts with pre-production work. Some more colour tests, etc. 

Aim for the week: Finish all necessary preparatory work ready for Hand-In on the 12th December!
Rework the animatic!


---jkl

Wednesday 30 November 2011

Scene Colour Test and more Animatic Feedback...

Scene Colour Test:
  I produced a frame from the beginning of the film in detail and attempted a colour test. This was prior to the comments from Jerry Hibbert (below), but it definitely supports his feedback. It took me a long time to choose the colours, and a long time to execute them to a standard I was (somewhat) happy with, but the time taken to do this needs to be taken into consideration for the time I would have on the final film and how many backgrounds of a similar look would be needed to be coloured this way.
   I added some background characters to show ideas of what the other children could look like in the same shot. I used a "dry media brush" in Photoshop for the background colours. I like the grainy/canvas look. I'll do some more tests with other brushes and other textures to find ones that work well for the final film.


 I also did some little fun sketches of other background character designs. It was a "eureka!" moment when I realised instead of getting bogged down with creating other characters, I could draw my own friends as children! It was too cute of an idea not to draw them straight away! So here are a few - all from my animation course!


Further Animatic Feedback:
1. In the morning I saw Matthew Gravelle, for some feedback on my first animatic as shown in the previous post. He provided some interesting points:

-Cut the first scene where Mollie and Babbit are sitting on the wall.
   Matthew thought the scene where Mollie meets Babbit in the coatroom later on in the animatic would work better if the audience wasn't already familiar with Babbit. By cutting the first scene, thus starting the film with Mollie in the classroom on her own, would show her loneliness more clearly, and make the first meeting scene in the coatroom stronger.

-All scenes are a little too long by about 2 seconds or so. 
    I will go back to the animatic and cut some shots down. I was trying to show long shots for a slower, more moodier atmosphere, but some shots do need to be trimmed down, as they really are too long.

-Extend the meeting (in the coatroom) scene with Mollie and Babbit. Get a more emotional impact. Then do a montage scene of Mollie and Babbit together. In the montage, have some very simple shots, illustration-like, not much movement, with her classmates doing the same activities as Mollie and Babbit. Show Mollie wanting to join in every time, with Babbit growing a little smaller every time she does so. In this animatic, you don't get the importance of Mollie's relationship with Babbit. This should be the most important thing to show.
   This is a very good point that had somehow been overseen in the animatic, but something that I was becoming aware of. Mollie and Babbit weren't really shown together on-screen for very long at all. I'm really glad Matthew pointed this out. It means I have to go back and change a big chunk of work, but I do really need to show Mollie and Babbit together more, for clarity, and for the story to have meaning! I will also try and make sure the montage doesn't have much movement to save myself the trouble of difficult pieces of animation performance. It will require precise and clear story-telling through strong layout and composition.


2. As well as Matthew, I also emailed Jerry Hibbert and a a few of the guys at Hibbert Ralph, my animatic. I went to the Hibbert Ralph Animation studio in Soho, London, over the summer for a work experience placement. I started developing story ideas for my final film whilst I was there, and was able to show my ideas to a few of the people there, so I had some great influences right at the beginning. Jerry Hibbert gave me some feedback on my first animatic:

-I couldn't really understand the narrative of your animatic. But there some sweet images in there of the girl and her rabbit - both the giant one and the regular one.
   I will have to work on the clarity of my animatic, for the narrative didn't seem to come through here. I will be drawing a neater version for the next animatic, so hopefully the narrative will become clearer then.

-Make sure that when you cut, the figures change size so it cuts properly and for a reason and doesn't look like a weird arbitrary jump cut. And cutting from full face to profile can be odd too. Three quarters views are usually prettier anyway - try to avoid full profiles. Work it up more and make sure the story comes across.
   I'll make sure the cuts are clearer and the proportions are more accurately drawn in the next animatic. I also like the point about keeping 3/4 shots of Mollie's face instead of the frontal ones. I will definitely incorporate this into the next animatic. It will hopefully help me sort out problems with composition and layout etc.

- Don't worry too much about colouring it all up. A film with a title and an end looks like you followed the project through. what you want people to think is "She can animate well - and has the staying power to finish." Not necessarily "She's good at colouring her animation."
   I really appreciated this comment in particular. The colour in my final film is still not completely thought out and finalised, purely for the reason that I did not know which way to go. In prior tests with feedback, the "lilac shades" looked nice but seemed like a "lazy" option to some, whereas the full range of more realistic colours (skin colour, blonde hair colour, red school jumper, etc) looked better, but took far longer to achieve. It's a case of weighing up these pros and cons and judging which will be best to go forward with. I do think a simple colour palette, with just simple shades of a certain colour would work, and it's a style I really love anyway. Full colour would look great, but in the time I have to complete this film, I think it may be more realistic to use a limited colour palette. My intentions right at the beginning were to keep the colours simple anyway. I want people to focus on the animation performance and the story the most. The colour and backgrounds were not as important to me, overall. I will produce some more visual tests to see what method could work, more working with the limited colour palette.

So this week I will:
-Develop a second version of the storyboard/animatic, and I need to find and edit some music for it.
-Do further, more extensive colour tests of scenes that could be in the final film. Test colours, brushes etc.
-Start the Negotiated Proposal and Production Bible ready for Hand-In for the 12th December.


---jkl


Thursday 24 November 2011

A New Storyboard - Animatic w/ Feedback..

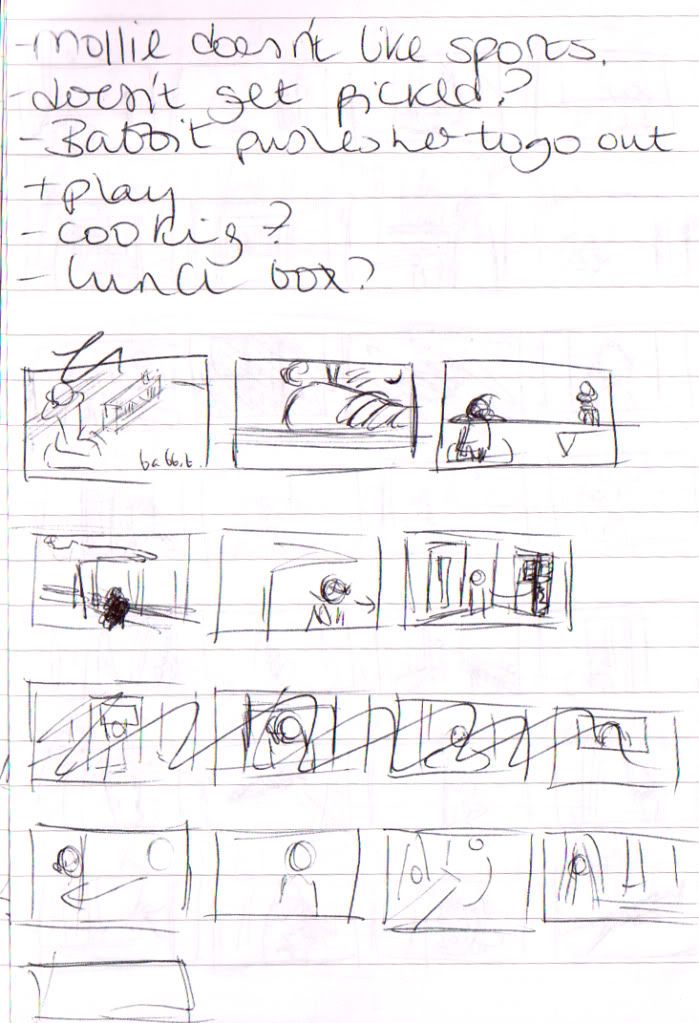
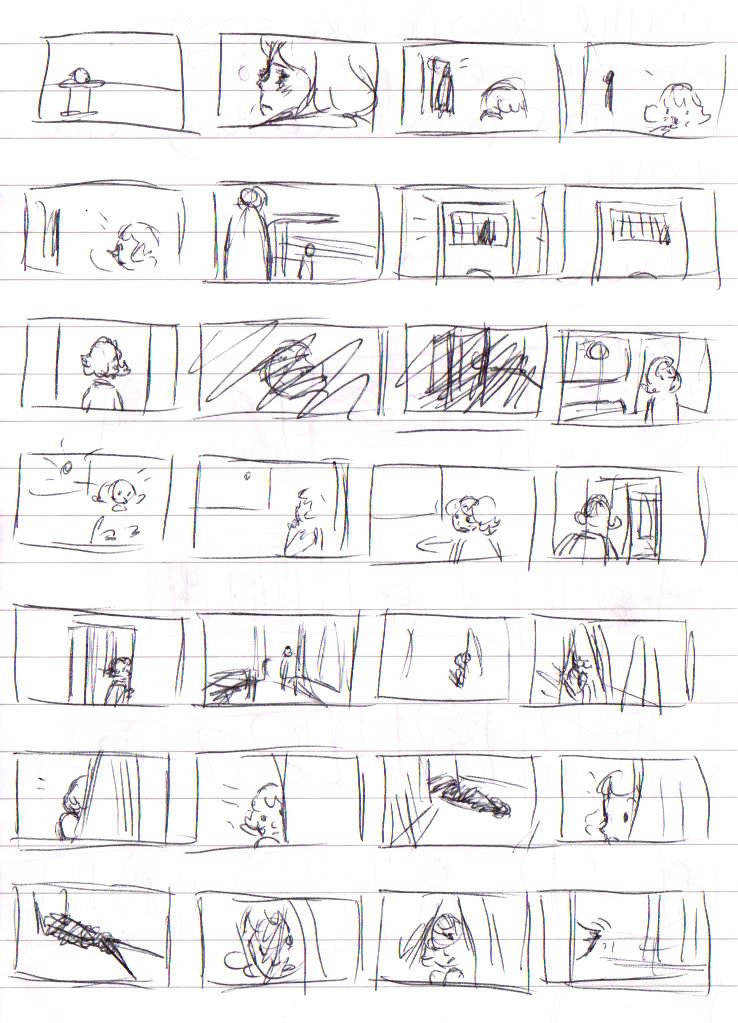
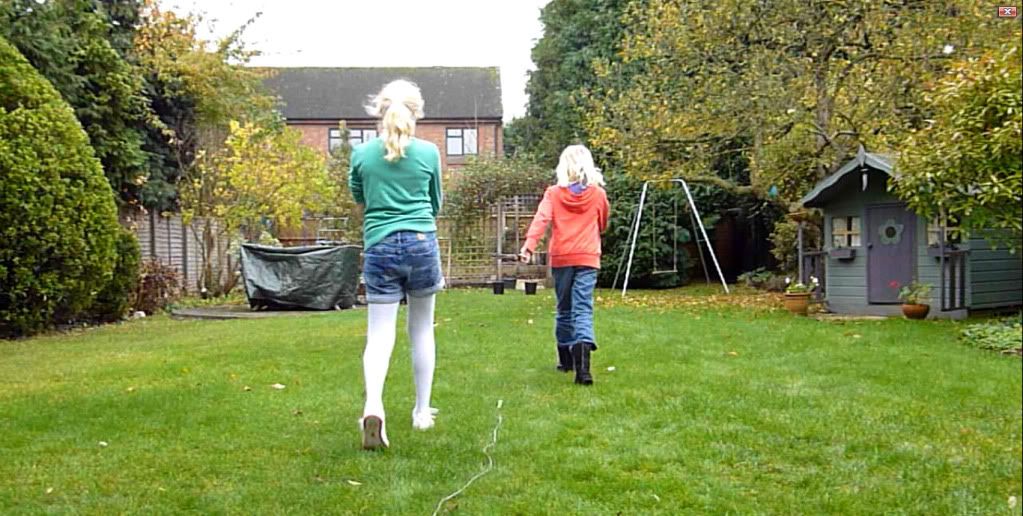
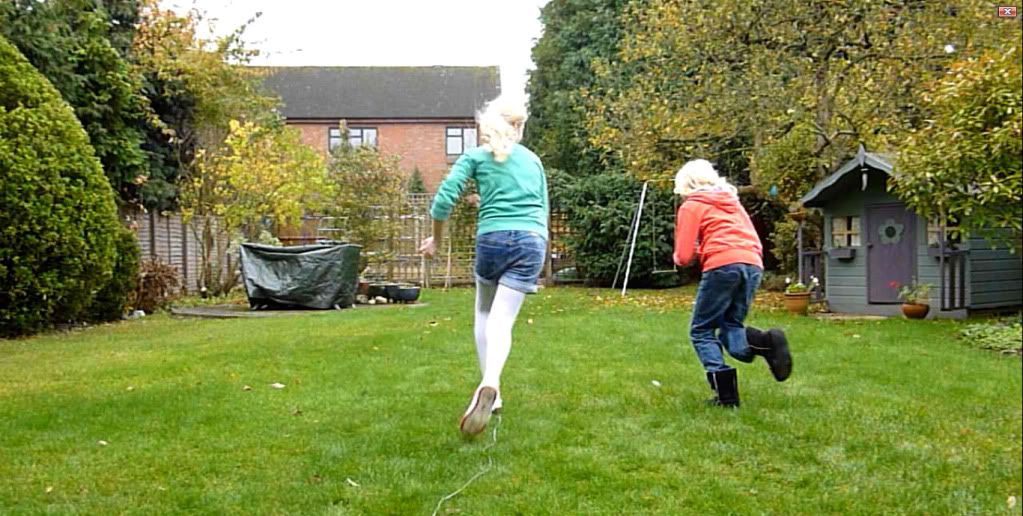
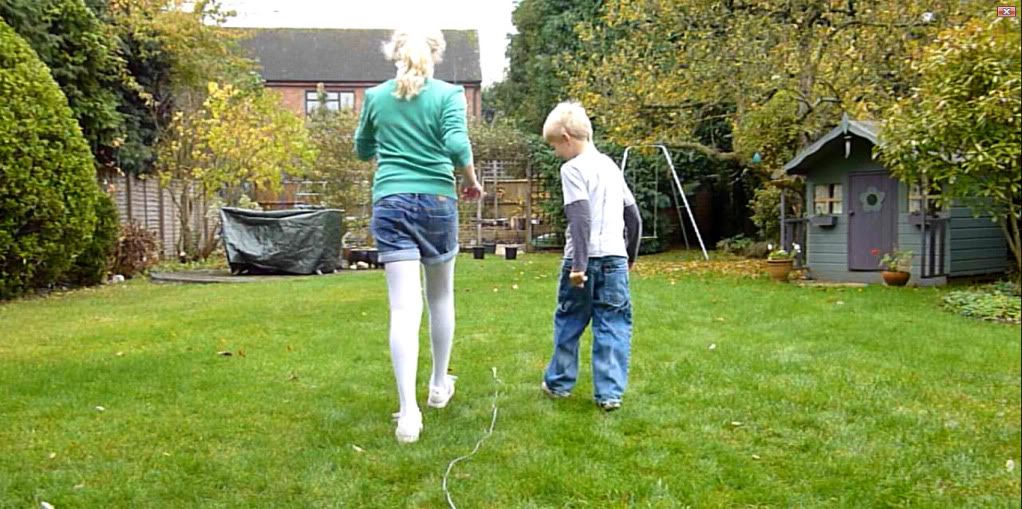
This past week I gathered all my notes and feedback from the past few weeks of development and set about re-drawing my storyboard.

I had started drawing small story situations as rough biro thumbnails. This method really helped me act out the scene ideas quickly without worrying about the shot construction too much. I just needed to get the information done as quickly as possible.
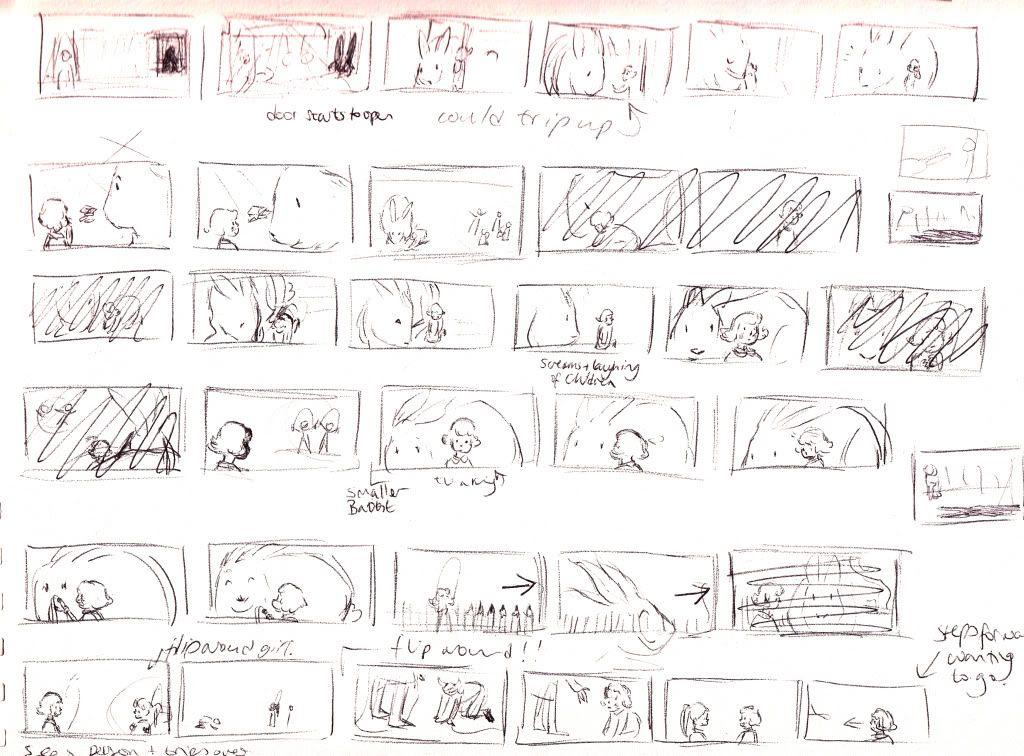
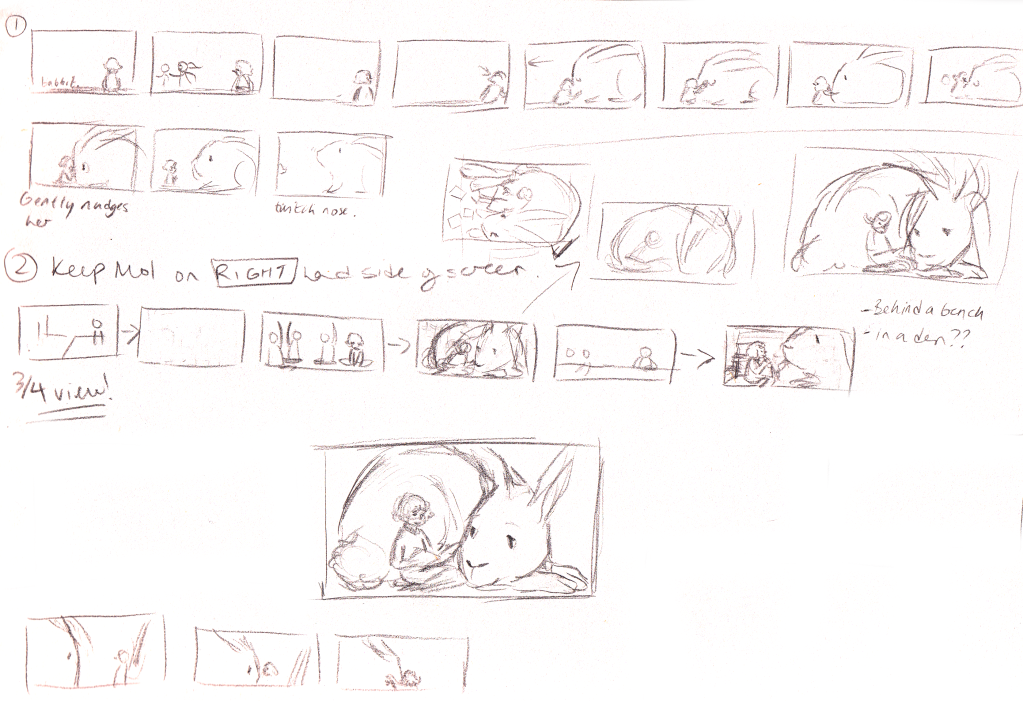
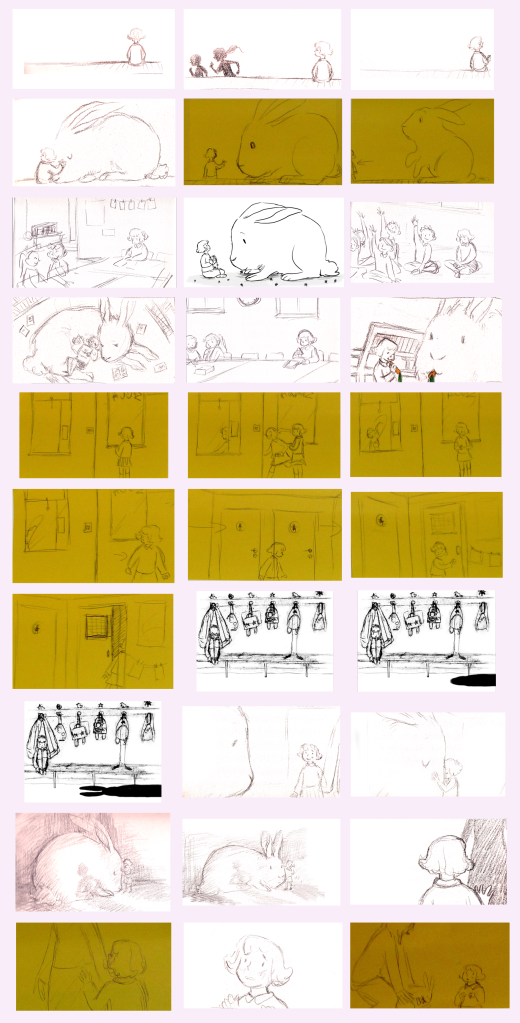
These scans show my preliminary story sketch thumbnails done over a few weeks (since my first storyboard).

1.
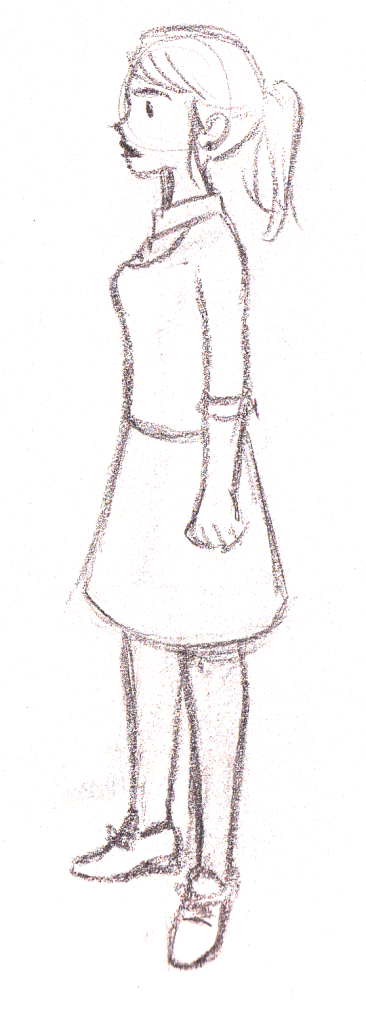
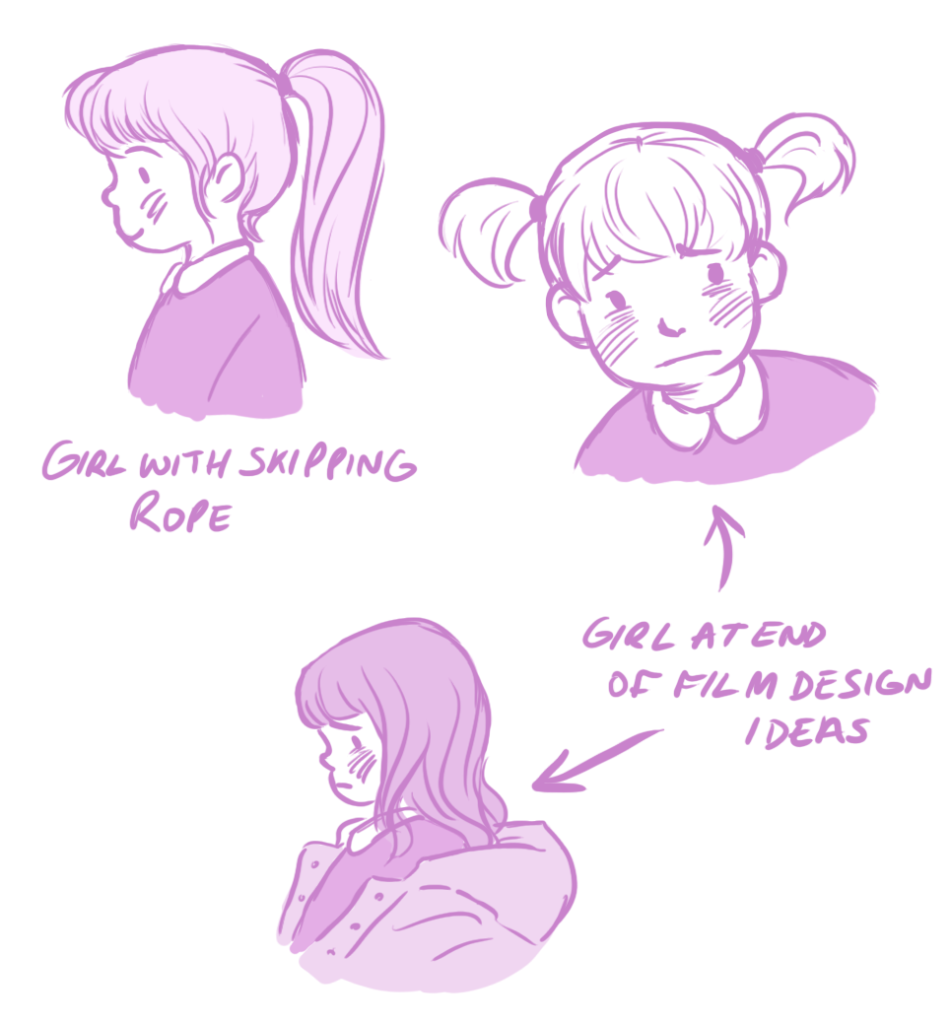
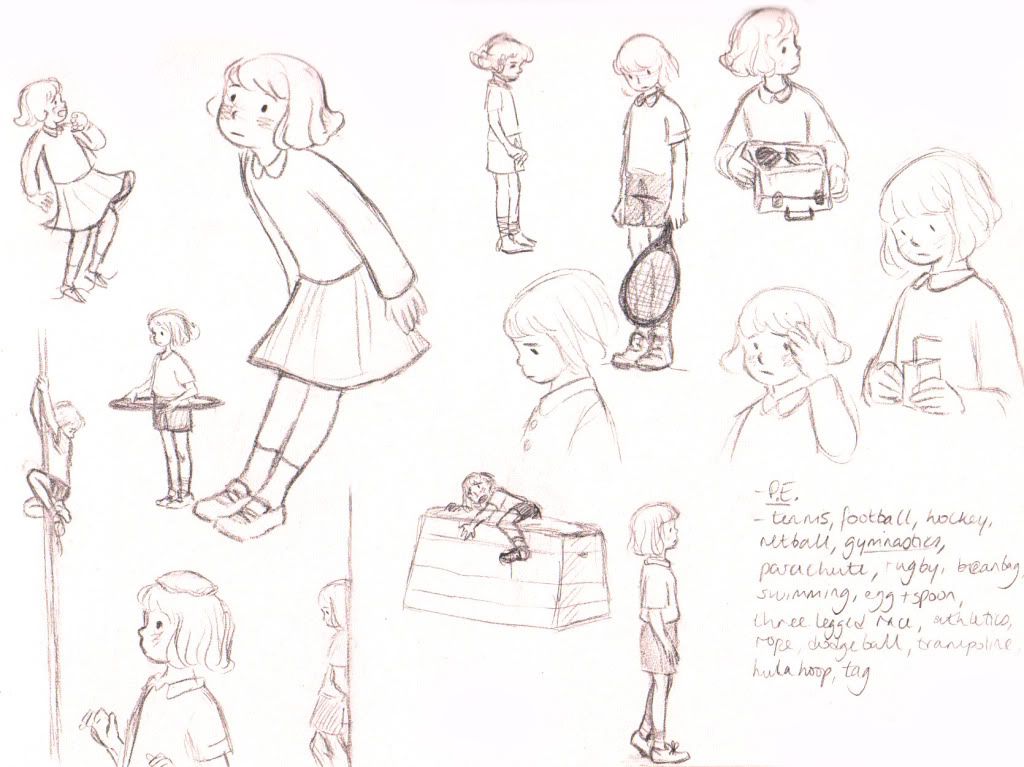
 In this page, the thumbnails start by showing beginning ideas for shots in the film. Mollie sitting by the window, with different shot ideas. The next line has ideas for how Mollie then walks out of the room and into the coatroom..
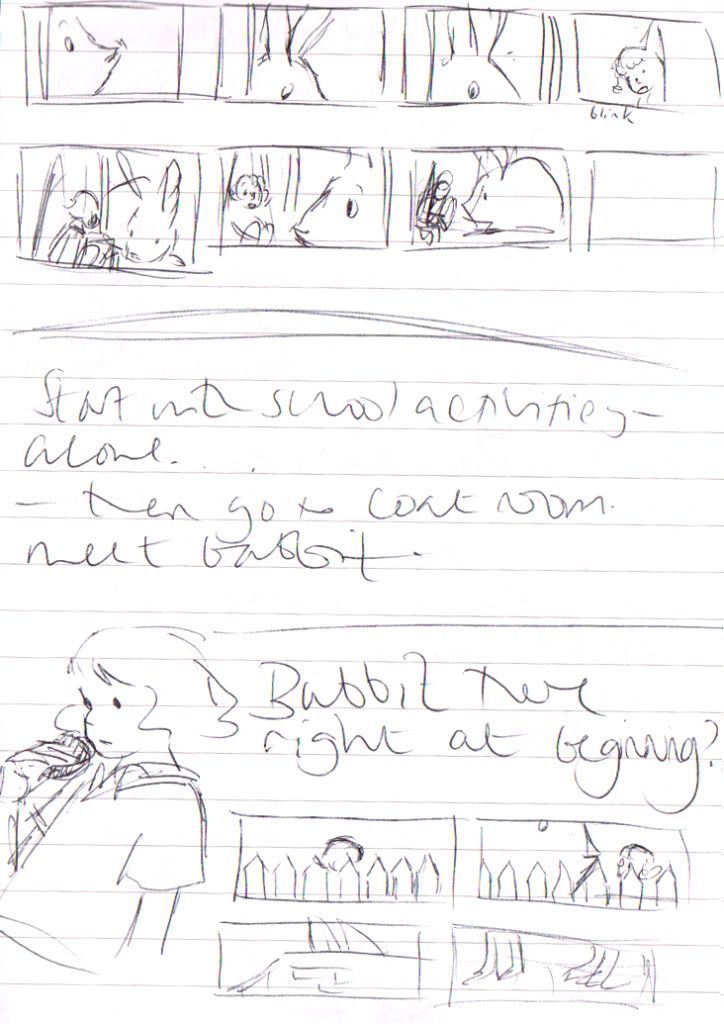
2.
These thumbnails start by showing Mollie inside by the window again. I was trying to get different perspectives.. A teacher comes in, tells Mollie to leave and shuts the door. Mollie is then slightly begrudged, and sighs. A football slams into the window behind her in the shot and, startled, she jumps, then runs into the coatroom. She hides inside a coat. A shadow grows as it nears the room where Mollie is. There are lots of reaction close ups of Mollie's face to show her being scared. Then a pair of rabbit ears spring up, and a large rabbit nose appears through the door at a side angle for a cute, comical appearance.
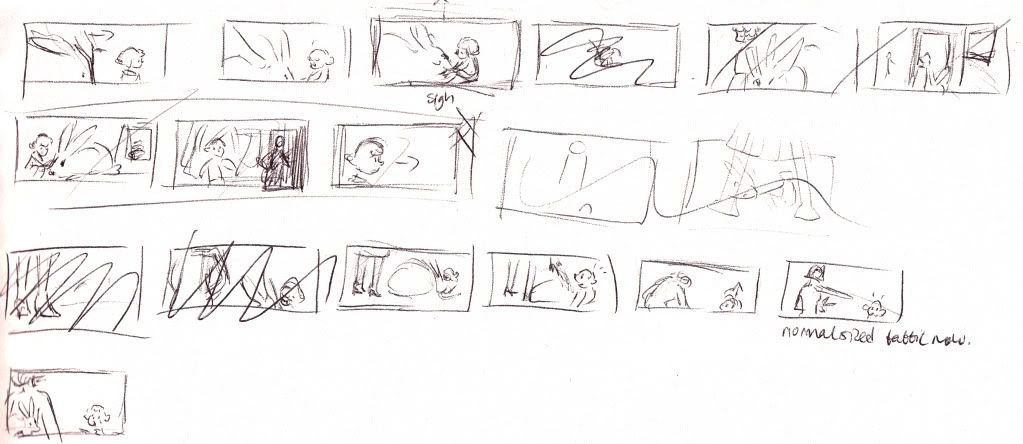
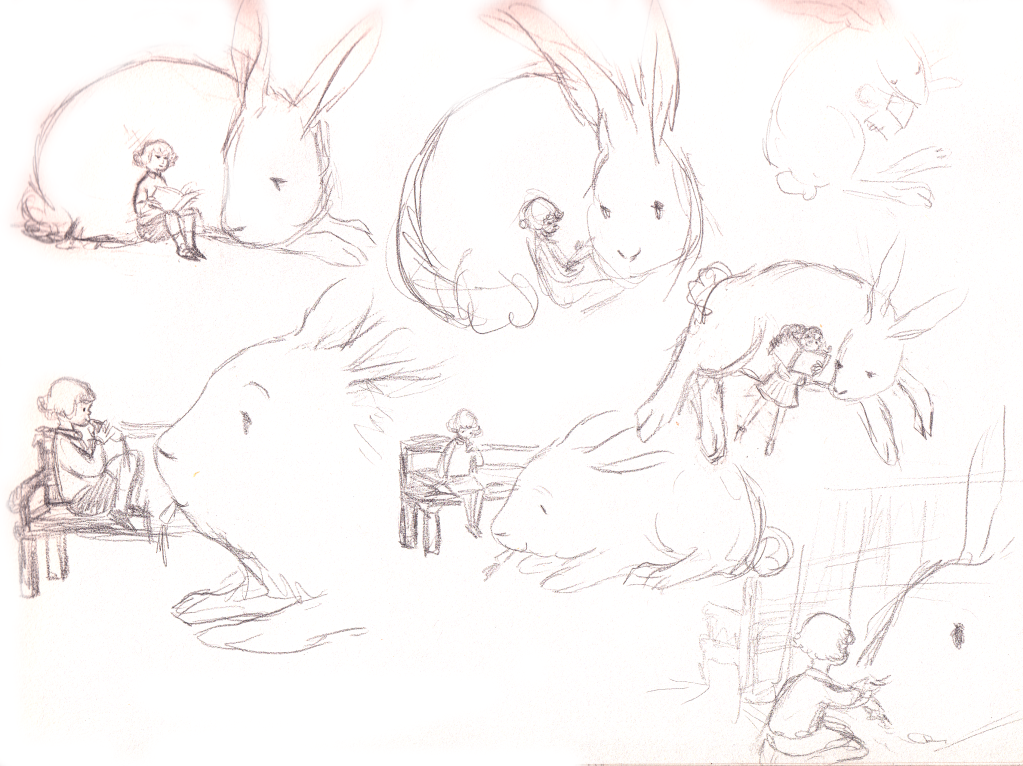
3.

These thumbnails follow on from the page before... Babbit steps through the door and makes his way over to Mollie. This would be the first introduction of Babbit to the audience, which is why Mollie looks slightly perplexed and confused when she first sees him.

As I was thumb nailing, I started to realise how long this scene would be, and how much time it would take up in the film. If I wanted to show Mollie's insecurities and Babbit helping her to overcome them with three "acts/moments", this first meeting/introduction scene to Babbit was definitely taking too long to show...

I wrote down an idea - "Babbit there right at the beginning?" I went with it. If Babbit and Mollie were simply established right at the beginning as being together, then I had much more space to create and develop the story.

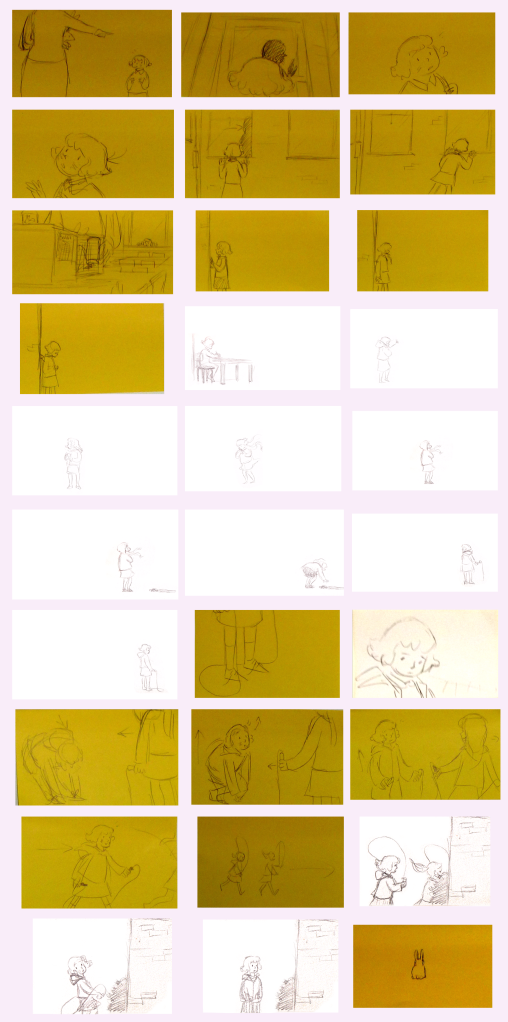
So the bottom thumbnails show some shot ideas for the very beginning of the film - a fence as a foreground. Mollie's head would bob up and down, walking behind the fence with the top of her head visible. She would stop, look behind, and then there would be Babbit (large) bounding into shot behind her... I was thinking of wall height - as Babbit would be much taller than Mollie, the "camera" would follow the fence which would then show a wall which was taller than the fence. So then, the shot would show just babbit's ears bobbing up and down...
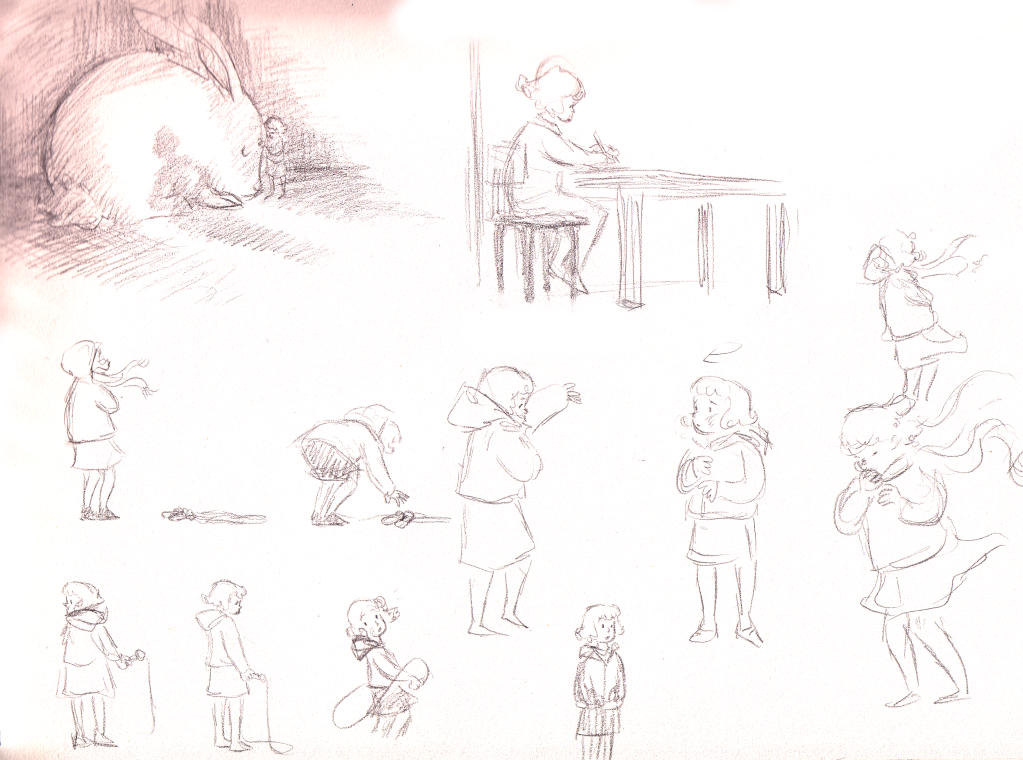
4.


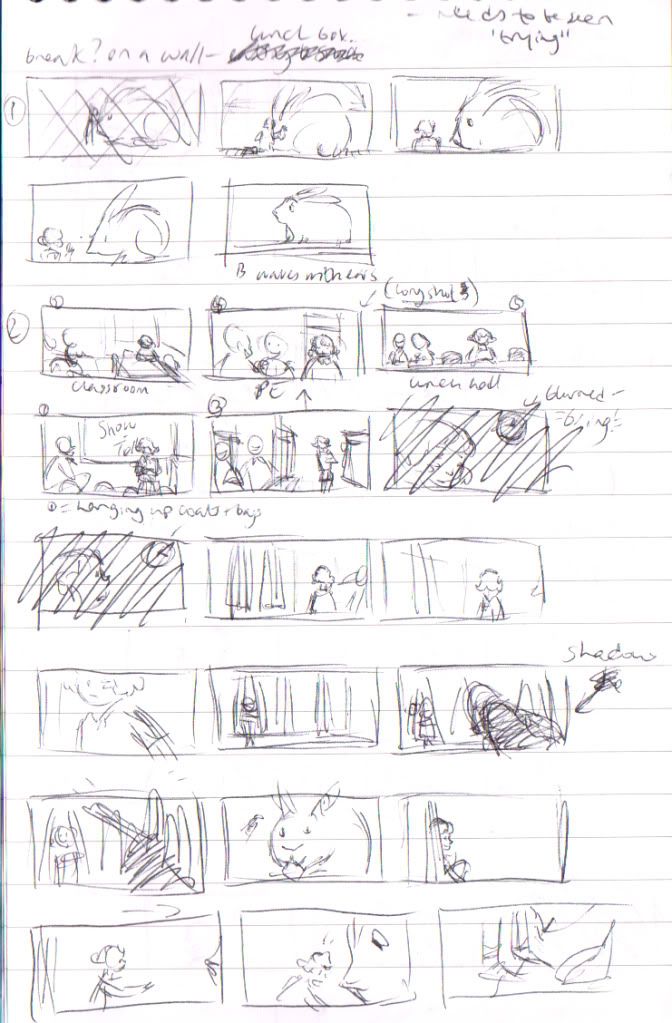
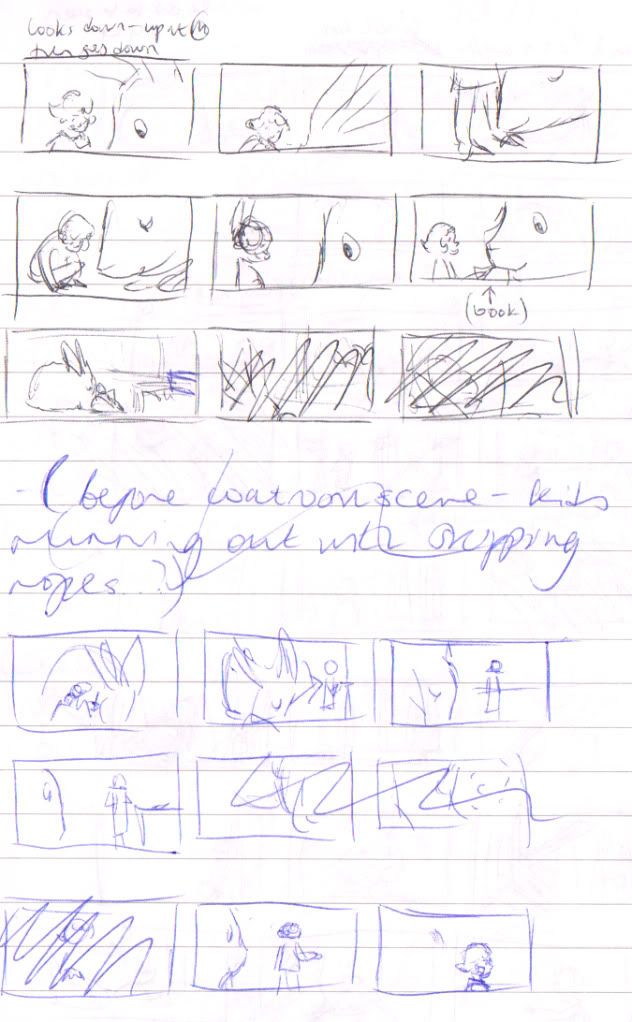
These set of thumbnails start by showing another establishing shot for the film. Mollie and Babbit are sitting with their backs to the camera, and Mollie is leaning on him stroking his face gently. The school bell would ring, and Mollie gets off the wall and walks away, Babbit watching her leave with a caring and warm look. Then it cuts to lots of ideas for Mollie in shot, isolated. Her head is in the same area of the screen as she stays relatively still, looking shy, unconfident and sad and her classmates would be looking happy and getting along with other things (etc). Examples of shot locations - the classroom, the Sports Hall, the lunch room table, the changing rooms...(etc) Then a shot of her classmates running outside, and Mollie turning back towards the camera and walking into the coatroom for the meeting with Babbit scene. This time, there are far less shots that the first few thumbnails as shown in Thumbnail pages 2 and 3, as Babbit has already been established right at the start. This gives more room to play with fewer shots that are better constructed to give the same/necessary information.

5.


This page of thumbnails continues from the one before, with Babbit helping Mollie tie her shoelaces. The "tying shoelaces" theme is still one I want to keep. Though not as prominent as in these shots. I will change this by having more subtle shots of Mollie with her shoelaces undone at the beginning of the film, and then showing Mollie tying them herself later on to show she is growing up.


Initial Feedback:
I showed these to my tutor, James, on the 14th November. I was having a lot of trouble trying to sort out the middle section of my story still. These pages showed the build-up, and I still wanted the ending shown in the first storyboard, but I just wasn't connecting with the middle section. James helped me tremendously. I initially wanted to show Babbit growing smaller bit by bit as Mollie grew in confidence, but I knew this was definitely going to be challenging. I also hadn't completely worked out whether Babbit is visible to others.. James simply said that (in regards to the scene where Mollie is in the coatroom with Babbit) that the teacher could only see Babbit as a "real" and ordinary sized rabbit. Therefore, Babbit is actually a normal rabbit, but in Mollie's eyes, he is a huge, cuddly and comforting imaginary-friend size rabbit. I instantly loved the idea, especially the potential for the film where the audience will realise Babbit is real! After the reveal then, the teacher could send Mollie outside and now I could show Mollie having to face up to her situation of loneliness head on. Time could pass, showing Mollie alone still, but at the end of the moment, it could show Mollie accepting a friendship from a classmate and being content with it. Growing up; learning to not be afraid of an unfamiliar situation(s), but to give it a chance and see what happens!

Second Storyboard:

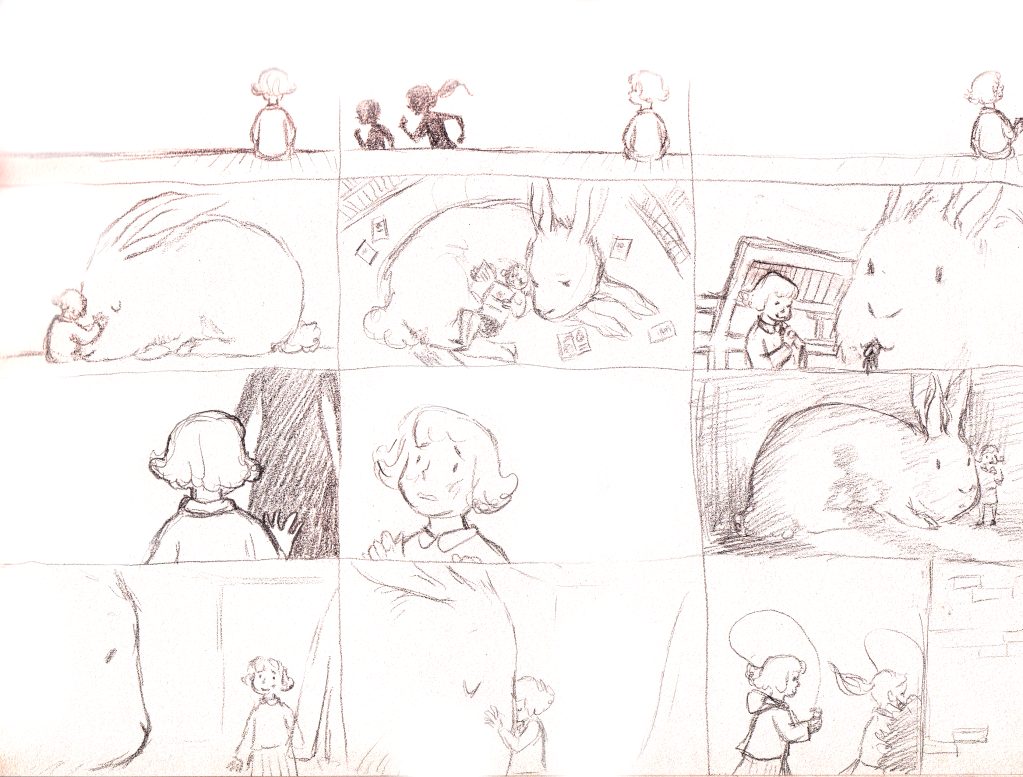
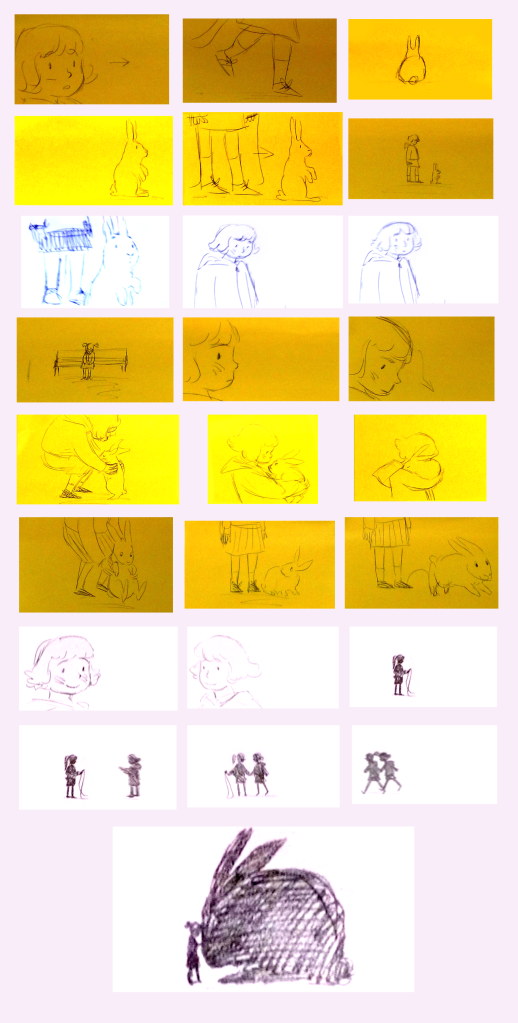
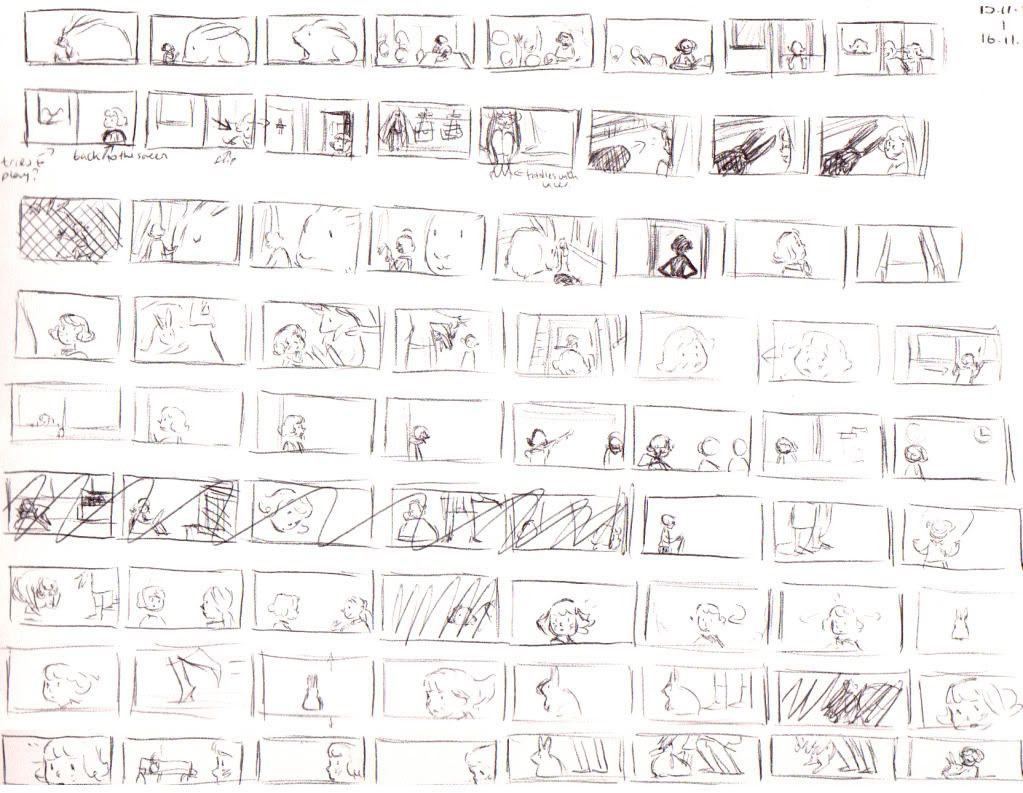
From this feedback session I finally had a clearer vision for my entire film with the middle starting to take shape. I decided to draw another set of thumbnails, this time, as an initial rough working out for the second official storyboard.


From this, I then started to draw the shots on wide post-it notes again as seen in the first storyboard. These are still very rough, but clearer than the thumbnails. I needed to show more detail, as this storyboard would be turned into an animatic. I didn't want to make it completely detailed, as I knew it would need lots of alterations in future feedback sessions. 


I then put together an animatic from this second storyboard. I brought the photos (shown above) into Photoshop and cut them into separate images. Using Premiere Pro, I lengthened specific shots and shortened others, I added a title and put in some cross fades at particular moments I felt needed them. I began to look for a music track, but felt I really just needed to focus on the story first. I will add music in my second rough animatic.  

**Animatic will be here on 26.11.11 due to internet problems!**

Feedback from the First Animatic (21.11.11): 

1. Gemma
I showed my rough animatic to Gemma Roberts (a friend on my course who's doing an epic film: http://littleacornfilm.blogspot.com/ ). She gave me a few points to think about after watching the animatic:

- After Mollie has been sent outside, instead of having the "time" montage of Mollie inside, the focus should be on Mollie outside at break times alone. I.e.: The times when she would usually see Babbit. 
 This is a good point that I had not previously considered. I will definitely incorporate this point into my second animatic!    

- Instead of showing the classmates (and teacher) "ignoring" or not trying to get involved with Mollie in the beginning few shots when she is being left out, I could instead show the teacher and classmates wanting Mollie to get involved, but Mollie simply wants to be alone with Babbit. This could be shown with Mollie constantly doodling pictures of rabbits, rabbit-shaped sandwiches, rabbit keyrings etc.
 Although this is a great point, I think that if I showed Mollie ignoring the attention of the classmates then the ending scene (where a girl in her class asks to play with her) a little confusing, and Mollie could come across badly. I understand the point, I have to make sure I don't make the scenes look like Mollie is being completely isolated by her peers. I just need to show that she is shy and unconfident and the other classmates don't really know much about it. It will have to be subtly done. Challenge accepted!

As well as this, Gemma suggested ideas for how some shots could be re-adjusted for clarity. She also lent me the book "Dream Worlds" by Hans Bacher for background research.

2. James  
I then spoke to my tutor, James Manning who offered me some feedback/advice.

-The first shot perhaps needs to be set up a little better. Instead of having Mollie and Babbit in the shot straight away, It could instead have Mollie in a third of the frame, with the other 2/3s showing children playing or maybe even the sound of a playground to give the impression she is on her own, sitting on (a wall) and she is lonely, sad etc. A pan camera movement could then reveal the large rabbit, and then Mollie can embrace him.  
 I liked this idea, as it definitely sets up the film in a more fluid and visual way. The audience needs to recognise Mollie as alone and sad and young. When Babbit is revealed, the audience will be surprised to see the large rabbit, but will instantly recognise him as a symbol of comfort for this sad, lonely girl. 

- James suggested I cut out a few shots out from the final scene. He liked this image a lot...:


...and felt that the shots in-between didn't need to be there up to the point where Babbit bounds off to be with the new child:


The hug scene was too "shmultzy" and he felt it wasn't needed. 
 I wasn't too sure about this, as I really like the hug sequence! I saw his reasons for his argument, so will work on the shots he had an issue with to make them stronger visually, as I believe these shots are a lot weaker than others in my film and can definitely be improved. However, I don't think I'm strong enough to let go of the hug sequence entirely! 

- For the first sequence showing Mollie in different school situations, Mollie needs to be placed on the left-hand side of the frame to begin with so to comply with filmic lanuage and the rule of thirds in film. He also suggested Mollie progressively moving across the screen (starting from the left) and over to the right to further implement the illusion of time passing.  James suggested to look up Bruce Block for further research on filmic language and ideas.
 This could be used in either the first or second sequence where time passes. I think it would work best for the second sequence, however I will try both to see how/if it works. I very much like the idea of Mollie progressively moving across the screen, it will give a lovely fluidity which will hopefully look great if done well.

-James further told me to keep vigilant about continuity in certain shots. For example, when Mollie and Babbit are discovered by the teacher, (when the door opens and the teacher's shadow is visible on Mollie and Babbit) it cuts to a side profile shot of Mollie. The shot before clearly shows Mollie and Babbit standing next to each other, so Mollie would actually be obscured by Babbit. I will have to decide how I want to work this out. Either Mollie steps forward to keep the shot of her from the side, or I have a back shot of Mollie's head so she can then fully turn round to face the camera as the teacher walks past her to get Babbit. James reminded me of the 180 degree rule in filmic language too, whereby to keep the fluidity of a scene, the camera shouldn't cut past a character's face profile over 180 degrees. This leads to a sense of disengagement, which could hinder the film's clarity and fluidity.

3. Leonie and the MAs. 
I had organised earlier in the day to see my tutor, Leonie,  to show her my animatic too. She suggested I come to her MA lecture in the afternoon so I could get feedback from the MA animators too. So I showed the animatic and got some great feedback from the class and Leonie. When Leonie asked the MAs to interpret the story after the animatic had finished, one student completely understood the story and got everything spot on! I was very shocked but pleased I had got the message across clearly! 
So here are the points they gave me:

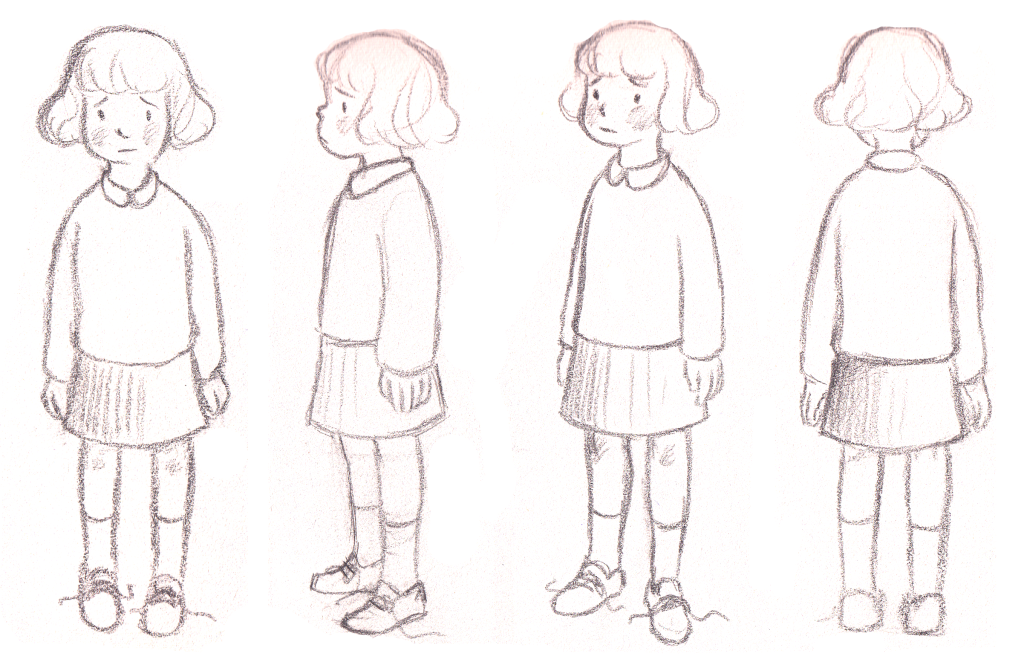
-Keep an eye out for the proportions of Mollie. She sometimes looks much older than she should do. She needs to look young and chubby. 

- Keep the hug shot! Leonie loved the final hug sequence between Mollie and Babbit and basically forbade me to cut it out! The MA's liked it too. 
 I was very glad, as I was a bit disheartened when James had told me to cut it out. Leonie wholly disagreed, so I will definitely be keeping this scene in the film! As described above in James' feedback, I won't completely dismiss his feedback, as I value everyone's opinions greatly. I just need to make those shots stronger to support the "shmultz".

- The Babbit reveal at the beginning could be extended. Maybe Mollie is lying down on the wall looking upset, and her head appears to be lying on something fluffy. The camera would slowly pan to reveal the fluffy thing as Babbit to make this scene a little more interesting. Think of shot construction more effectively.
 Great little "reveal" idea! I will definitely play around with this for my second animatic!

- There was confusion when Mollie sees rabbit outside after she's just began to play with a classmate. The MA's were wondering whether this was a different rabbit altogether.
 This is a tough question to see to. I will have to work on the build up to this particular scene to make sure the audience definitely realises this as the same Babbit throughout the film.

- Leonie was uncertain why Babbit was taken off Mollie in the scene with the teacher finding Babbit. 
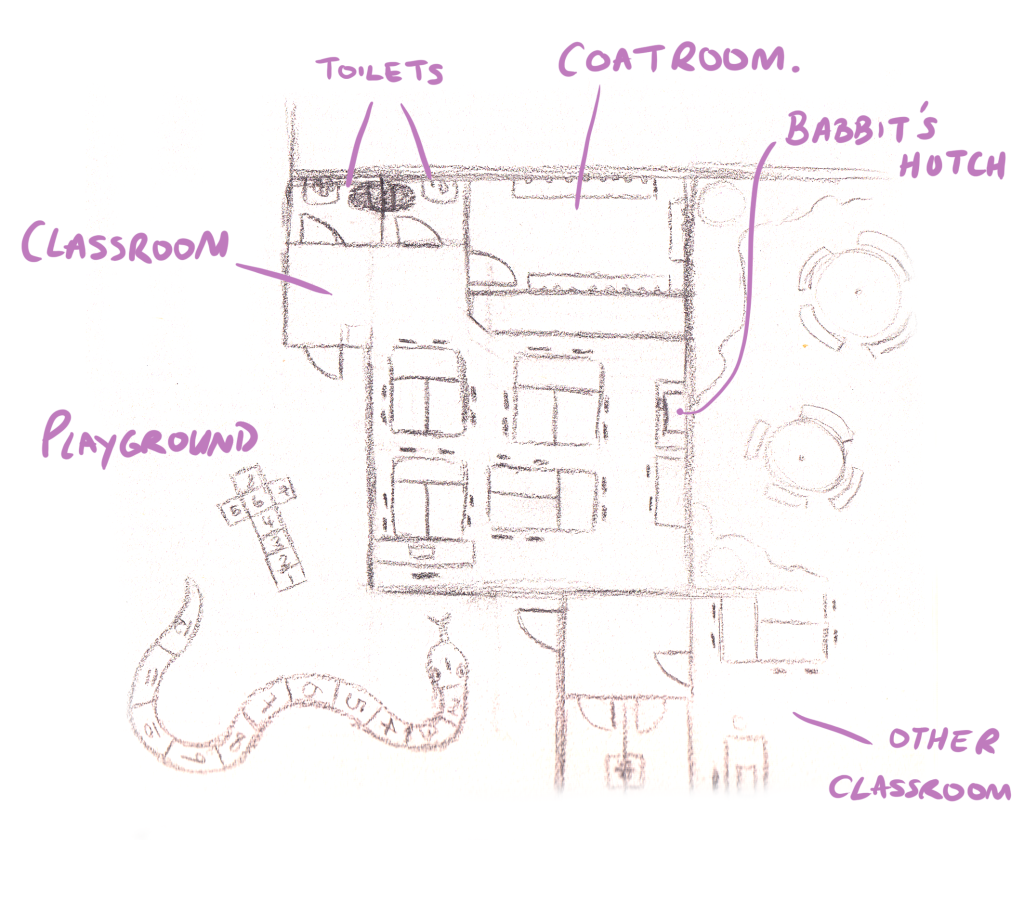
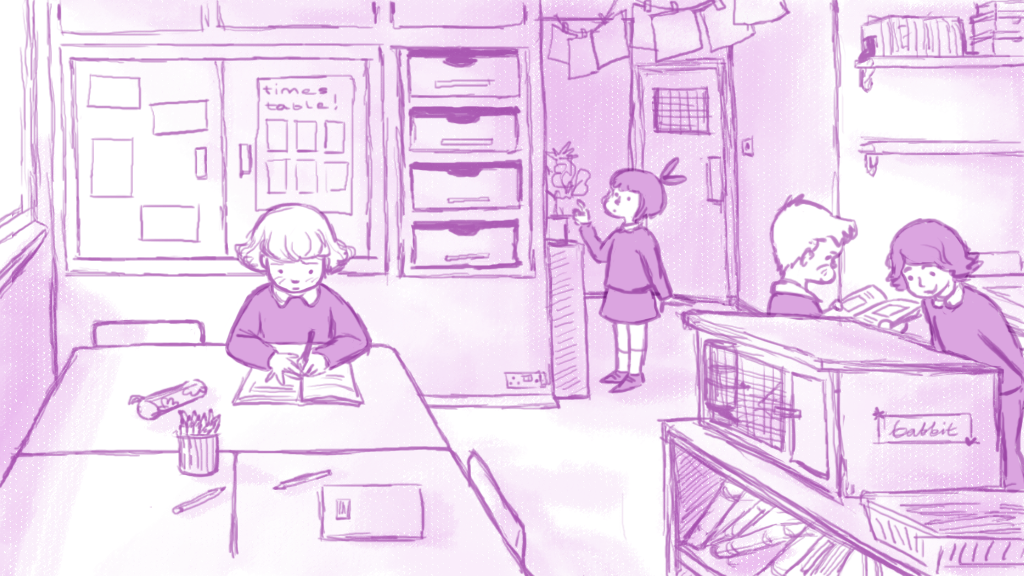
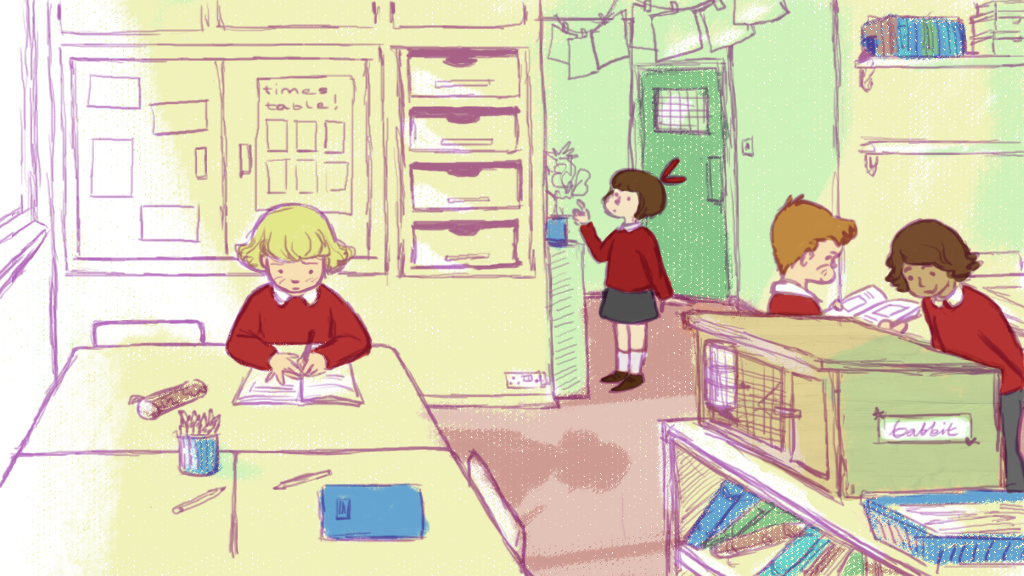
 I want to show that Babbit is actually the class pet. I think I will have to show this at an earlier point to make the connection a bit more obvious, as perhaps to have Babbit revealed as the class pet just after the teacher finds him is a bit unclear. There is a scene where Mollie is in the classroom right at the beginning (in the first progressive time-span scene) where I can put a rabbit hutch in the background to show continuity. 

- Work on the pacing of the film. Some scenes go to quickly, to slowly.

- Instead of being introduced to the new child right at the end of the film, the child could feature at an earlier point to further create a sense of fluidity. She could be featured in the background of any of the scenes with Mollie present. 

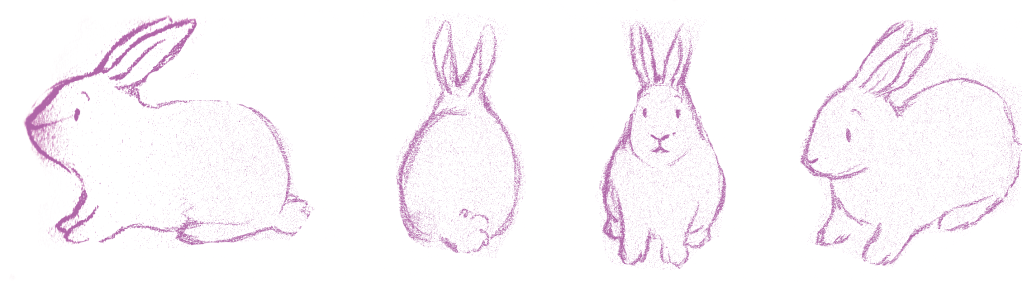
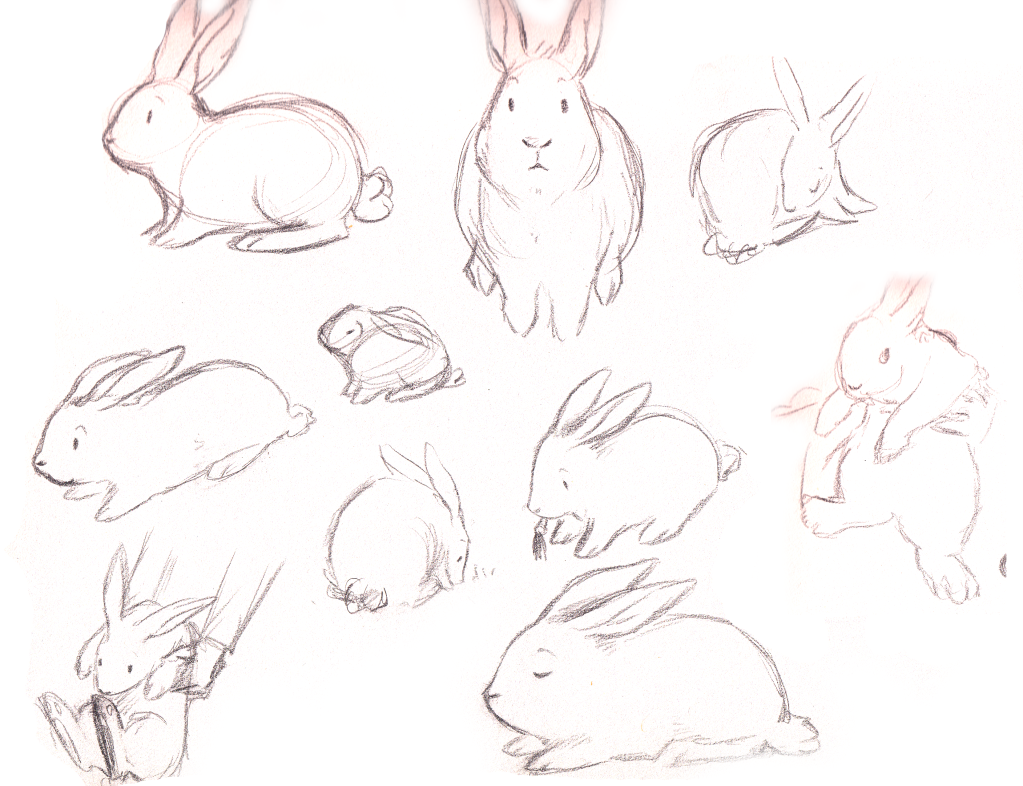
- Leonie suggested for me to look at James Thurber illustrations of rabbits to help me. She had suggested this to me in the first meeting I had with her. His illustrations depict great subtlety and the lines are incredibly sparse, but the gestures are always clear and readable. I will research his works further for the next post.

From this feedback I will now develop a second animatic encompassing all these points to help my story work more coherently. 


---jkl


Wednesday 23 November 2011

A Quick Forgotten Sketch/Story Development Idea!

On Monday the 7th of November I had a brief meeting with our tutor, Matthew, to briefly go through my story ideas... This was the week I had started animating the Mollie and Babbit walk cycles.

At this point I was still stuck on the middle section of my film; specifically, how I was going to depict Mollie as shy and embarassed and why Babbit's love and comfort is so important for her...

Matthew suggested I draw some early school situations, drawn from my own memories or just my own ideas of how a shy child would feel uncomfortable, nervous and unconfident.

He suggested some P.E. situations, such as Mollie being chosen last in a class doing a school sport... Also, having Mollie being "picked on" for her lunch items, for her hair cut, etc...so I played with these idea and drew a few sketches... I most prefered the P.E. situations, as thses would come across strongly in the film and would provide an excellent oppurtunity for character performance!


 I especially liked the drawing of Mollie in her P.E. uniform holding a tennis racket, though I feel she looks quite a bit older than she should. As I want Mollie in the film to look around 5 years old, I think that schools would probably encourage slightly easier sports activities for their lessons... This exercise presented some very insightful little scene ideas which I will incorporate for my next storyboard.

Matthew also suggested I get in contact with a local Primary school to ask whether I can visit for a day or two to perhaps observe the Primary school environement so I could get some first-hand research for my film. I have not yet found a school to contact, but I will hope to do so very soon. If I do not get the chance to do so by the end of this term, I will try and visit a Primary school during my Christmas holidays (and before those schools break up too!)


Next post: A New Storyboard and Animatic with Feedback!


---jkl

Monday 14 November 2011

Animation Tests...

This past week I have been producing a walk cycle for my main character, Mollie.


I had a lot of trouble at the start, as I was finding it hard to stop the character from limping. I did a fair few linetests at the start! I had drawn out some key poses taken from the reference as shown in the previous post. These very rough thumbnails provided me with some initial keys to refer to. However, they did not help as much as I thought they would..

Thumbnails of (the real) Mollie walking:


 Thumbnails of Ellen walking:


From talking to a few friends, they identified the problems I had were in the spacing of the feet. After they showed me the method of charting the position of the back of the heel for each frame and making sure they were all equal in length, I was finally able to complete a walk cycle properly!

I then faced a lot of trouble with the back arm of the character; the movement was hard to achieve, even with the front arm's movement working well. I had to stop re-working it, however, as too much time was being spent on trying to perfect it. The general movement of the cycle was working, so I then scanned and brought the images into Photoshop.

Here is a link to a video of the final rough pencil test for Mollie. I have coloured the lines purple (to resemble the style-inspiration of Sara Ogilvie's illustrations from "Rhinos Don't Eat Pancakes"). I then coloured it in two styles. First, a lilac monotone colour, which was suggested in the feedback from fellow students in the calss from the week 6 pecha kucha presentations. The second, a selection of colours that reflect a more realistic vision of what a real school uniform would look like:

Mollie Walk Cycle [rough]

I showed these to my tutor, James, today (Monday 14th Nov) at the seminar. He suggested I now try and composit a background in After Effects with the pencil test, which could then give me a clearer vision of what the final film could really look like.

Also, as I have been having increasing difficulties with my story, I was able to have some great feedback from James. He gave me some clear ideas on which way to take a certain story point, which I will discuss further in another post.

Also today, I finished a 'Babbit' walk/run cycle. Another friend on my course was able to get me some brilliant reference of their pet rabbit running around which helped extensively for this task.


This video shows my pencil test for the character, 'Babbit'. It is a walk/run cycle. There are a few areas that need refining. I will either come back to them at a later stage, or fix them in the final production of my film. I coloured the lines of 'Babbit' purple to match the walk colour test with Mollie.


Babbit Walk/Run Cycle [rough] - Vimeo Link


I will be re-storyboarding the entire film this week with the new and improved ideas from today's seminar. I will also need to attempt the background for the walk cycle's as part of a test to see how the final film may look. This will require me to research more into the design of the backgrounds I really want, so I will be posting some background designs and tests as soon as I can.

I will also be working on my "working life" report; an 1000 word report as part of our entire project hand-in. We are asked to write about a work experience placement if we had one; to talk about the industry we are aiming to go into; what business is like at the moment, what we learned from the experience, etc... As I was fortunate to have a brilliant 5 week placement in London over the summer, I will be writing about that.


---jkl

Thursday 10 November 2011

Design Development and Reference Footage...

Mollie Design Development
Some development sketches for Mollie's design. I was trying to find the best way of drawing Mollie's side, back and front face profile. The front profile is the most challenging. Drawing the whole chin cuts off the face shape from the rest of her body (as seen in the second on the left, top row). Drawing the chin that cuts off slightly for the front profile works much better (third from the left, bottom row). The side profile's work well, giving her a round chin and small nose shows her age and adds a "cute" aesthetic which is what I want to show.

On deviantART there is a brilliant meme that many artists have used called the "Expressions Meme" where you draw your own character depicting different moods/expressions. It's a good exercise to do when trying to build your character, making (her) more real and meaningful. For instance, I really like the "pouty" expression for Mollie. I haven't played with the idea that Mollie is a little bit moody in the film, but it is a possible character trait development idea..


More Story Development Idea Sketches
 A few more sketches of Mollie's face and side profiles are featured at the top of the page. The bottom of the page shows more sketches of story/situation ideas; i.e. Mollie drawing on the ground with chalk; Mollie in a winter coat and scarf; Mollie hugging Babbit; Mollie sitting on Babbit's head, reading.


Mollie being nudged forward by Babbit was an idea featured in a previous post. It was a powerful image, one that I want to incorporate into the second storyboard for my film. I think it is important to show Babbit pushing Mollie to go play with her classmates. Mollie is shy and unconfident and Babbit is there to change that. It's hard to step forward and take a chance in life, so this is showing that in the context of a younger child and a "imaginary friend" image.  I was also thinking whether the film needed a fantasy sequence, or something dream-like. The image of Babbit and Mollie beside each other with Mollie upside-down and seemingly weightless has an "Alice In Wonderland" feel to it, which could be a dream Mollie has.


Here are some more story/situation ideas with Mollie and Babbit. Mollie drawing; Mollie painting on Babbit; Mollie reading on a beanbag; Mollie looking quite worried standing next to Babbit; and Mollie riding Babbit looking happy. I am still not sure whether I want to incorporate Mollie riding on Babbit's back in the final film. It's quite a generic situation with a small child and a large "magical" friend. Babbit therefore needs to be "taken more seriously". Yes, he's a large rabbit and yes he's soft and cuddly, but he is also there to help Mollie grow in confidence.
 

Uniform Designs
Different uniform designs for Mollie. I need to select one that works best whilst animating and also looks good visually too. In the storyboard's, I automatically drew Mollie in a large jumper and skirt. These are some other possibilities I may want to experiment with once I have a finished walk cycle. I will need to get some colour examples done too.


Here are some bag/lunch box designs I may want to use in the final film too.


Reference Footage - Walk, Run, Skip 
I was able to get some brilliant reference of my cousins walking, running and skipping. These will help me greatly with the animation tests and as reference in general. I've taken stills from these videos of the back of their heads for privacy.

(The real!) Mollie, skipping:


..and walking:


Ellen (older sister) and Mollie walking:


..and running:


Ellen and Joe (younger brother) walking:


As I was with my cousins, I had the idea to ask them to draw "Mollie and Babbit" as they appear in my film. I drew a quick picture of the latest designs for Mollie and Babbit, and they set about drawing them!
This is what they came up with:

Ellen - Age 11: (Brilliant rabbit drawing!)


Mollie - Age 9: (Mollie and Babbit are featured here in the library in front of a bookcase!)


Joe - Age 5: (Mollie in red and white and a multi-coloured Babbit!)


On the Story Development side, I have been reading a few chapters from "Prepare to Board! Creating Story and Characters for Animated Features and Shorts" by Nancy Beiman, lent to me by my friend. It's given me a good few tips and pointers on developing my story. It says in one part, that a good, solid beginning and end for your film is important. The middle section can be built upon - this was a great relief!

Next week I will be properly finishing an animation test, so I will leave then compile all my initial animation tests and present them in the next post.

Next week: Animate a walk cycle!! Re-storyboard for Monday and possibly start creating an animatic.


---jkl